<?xml version="1.0" encoding="utf-8"?><feed xmlns="http://www.w3.org/2005/Atom" ><generator uri="https://jekyllrb.com/" version="3.10.0">Jekyll</generator><link href="/feed.xml" rel="self" type="application/atom+xml" /><link href="/" rel="alternate" type="text/html" /><updated>2026-07-24T18:54:09+00:00</updated><id>/feed.xml</id><title type="html">Nick’s notes</title><subtitle>Projects and trip reports</subtitle><entry><title type="html">Home Baked Climbing Holds</title><link href="/jekyll/update/2026/07/20/HomeBakedClimbingHolds.html" rel="alternate" type="text/html" title="Home Baked Climbing Holds" /><published>2026-07-20T00:00:00+00:00</published><updated>2026-07-20T00:00:00+00:00</updated><id>/jekyll/update/2026/07/20/HomeBakedClimbingHolds</id><content type="html" xml:base="/jekyll/update/2026/07/20/HomeBakedClimbingHolds.html"><![CDATA[<p>Recently I discovered that I had lost all of my documentation from the time that I tried to DIY climbing holds from my little apartment in Montreal. I’m going to try to recall everything I learnt, re-try my final recipe, and re-document it here for anyone who might want to try themselves.</p>

<p><strong>The mistakes</strong></p>

<p>I started this project trying to be as cheap as I could be. I found the prices of professional mold making materials to be expensive in all except bulk quantities, and I wasn’t sure how far I was going to take this project yet. Bathroom silicone and cheese cloth is what the internet proposes for the frugally minded. I remember being a very climbing-focused 24 year old boy, and thinking to myslef at the time:</p>

<blockquote>
  <p>What the heck is cheese cloth, and where would I even find that ?</p>
</blockquote>

<p>Writing this now at 31 I can say that I’ve caught up a little. I know about cheese cloth, Labneh, and i’m generally much better in the kitchen.</p>

<p>Then comes the question; what should I model ? What would be my first climbing hold ? Again, I was too cheap to spring for the florists foam, and wasn’t even confident in my abilities as a sculptor even if I had the means. So I looked around my apartment for something I would want to grasp as a very climbing-focused  year old boy; a red Bell Pepper, perfect! The climber’s fingers would wrap around the curve of the pepper where it met the stem. If this seems desperate and crazy, I can only say that it was Covid times and my mental health may not have been top notch.</p>

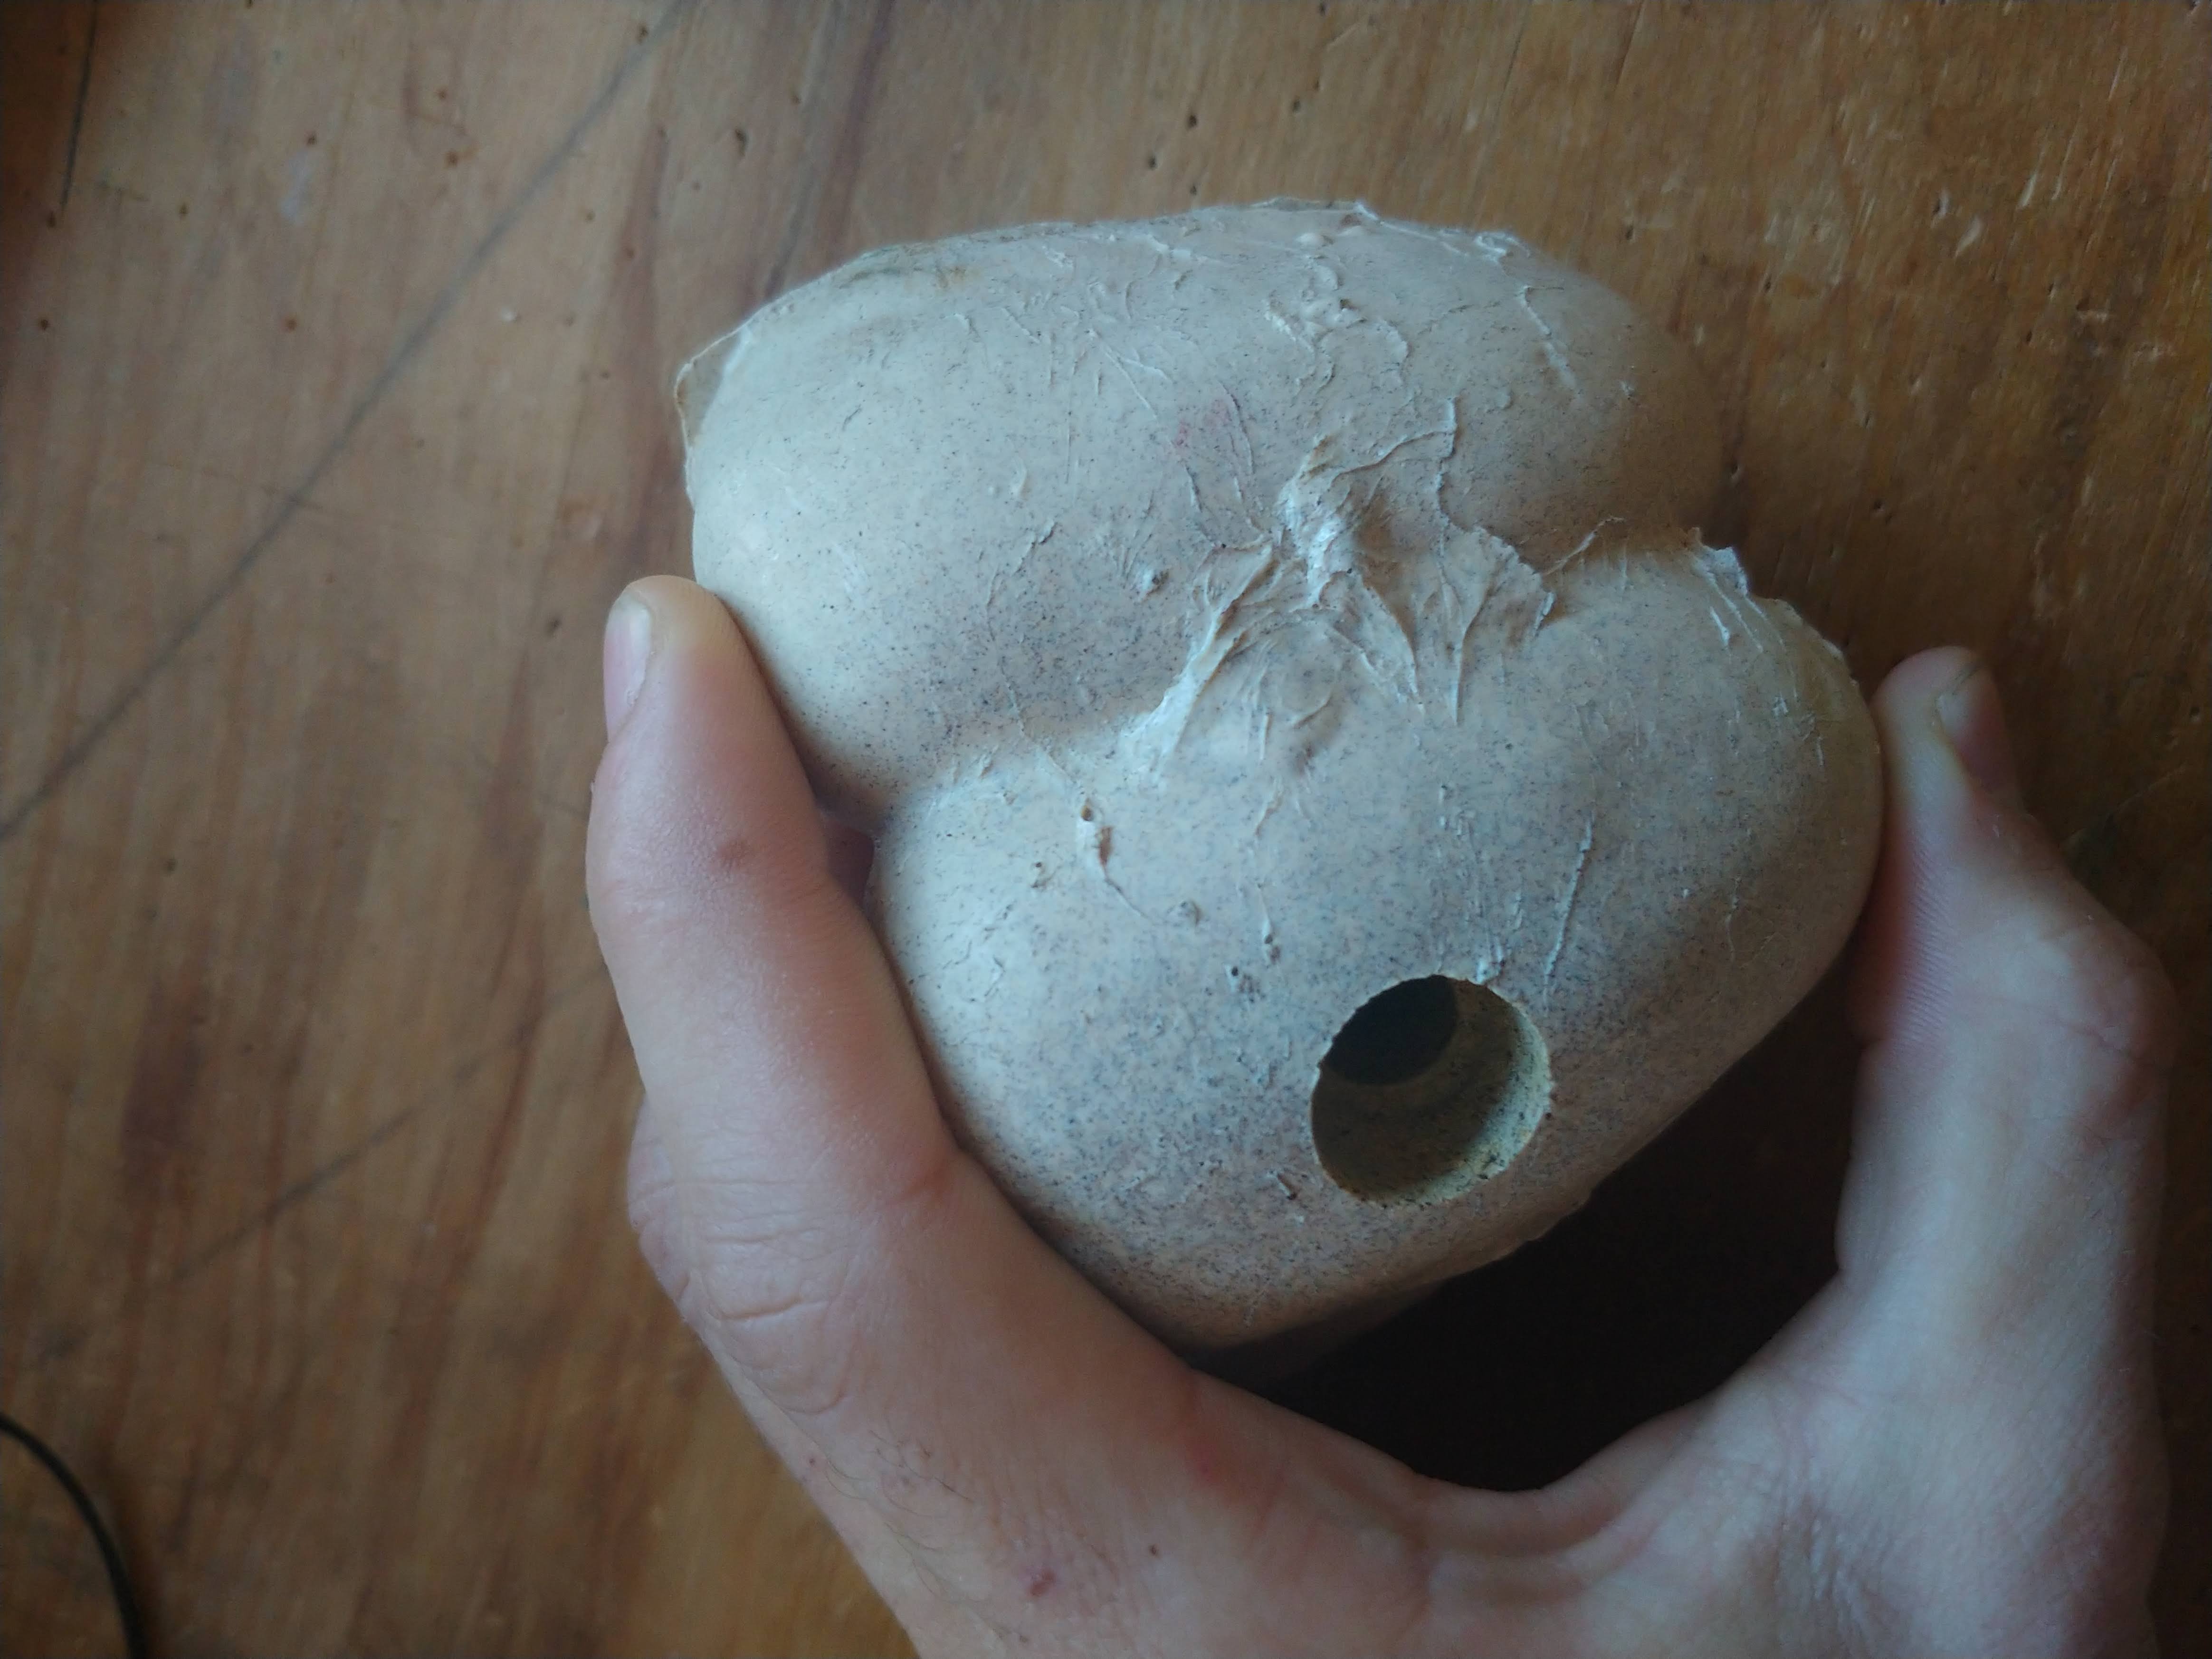
<p>In order to make a mold from hardware store silicone I mixed a bit of warm soapy water with bathroom silicone, then applied it to the half red Bell Pepper, cut in half lying on a piece of plywood. In between the messy, goopy layers of silicone mixture I would lay cheese cloth to give structure.</p>

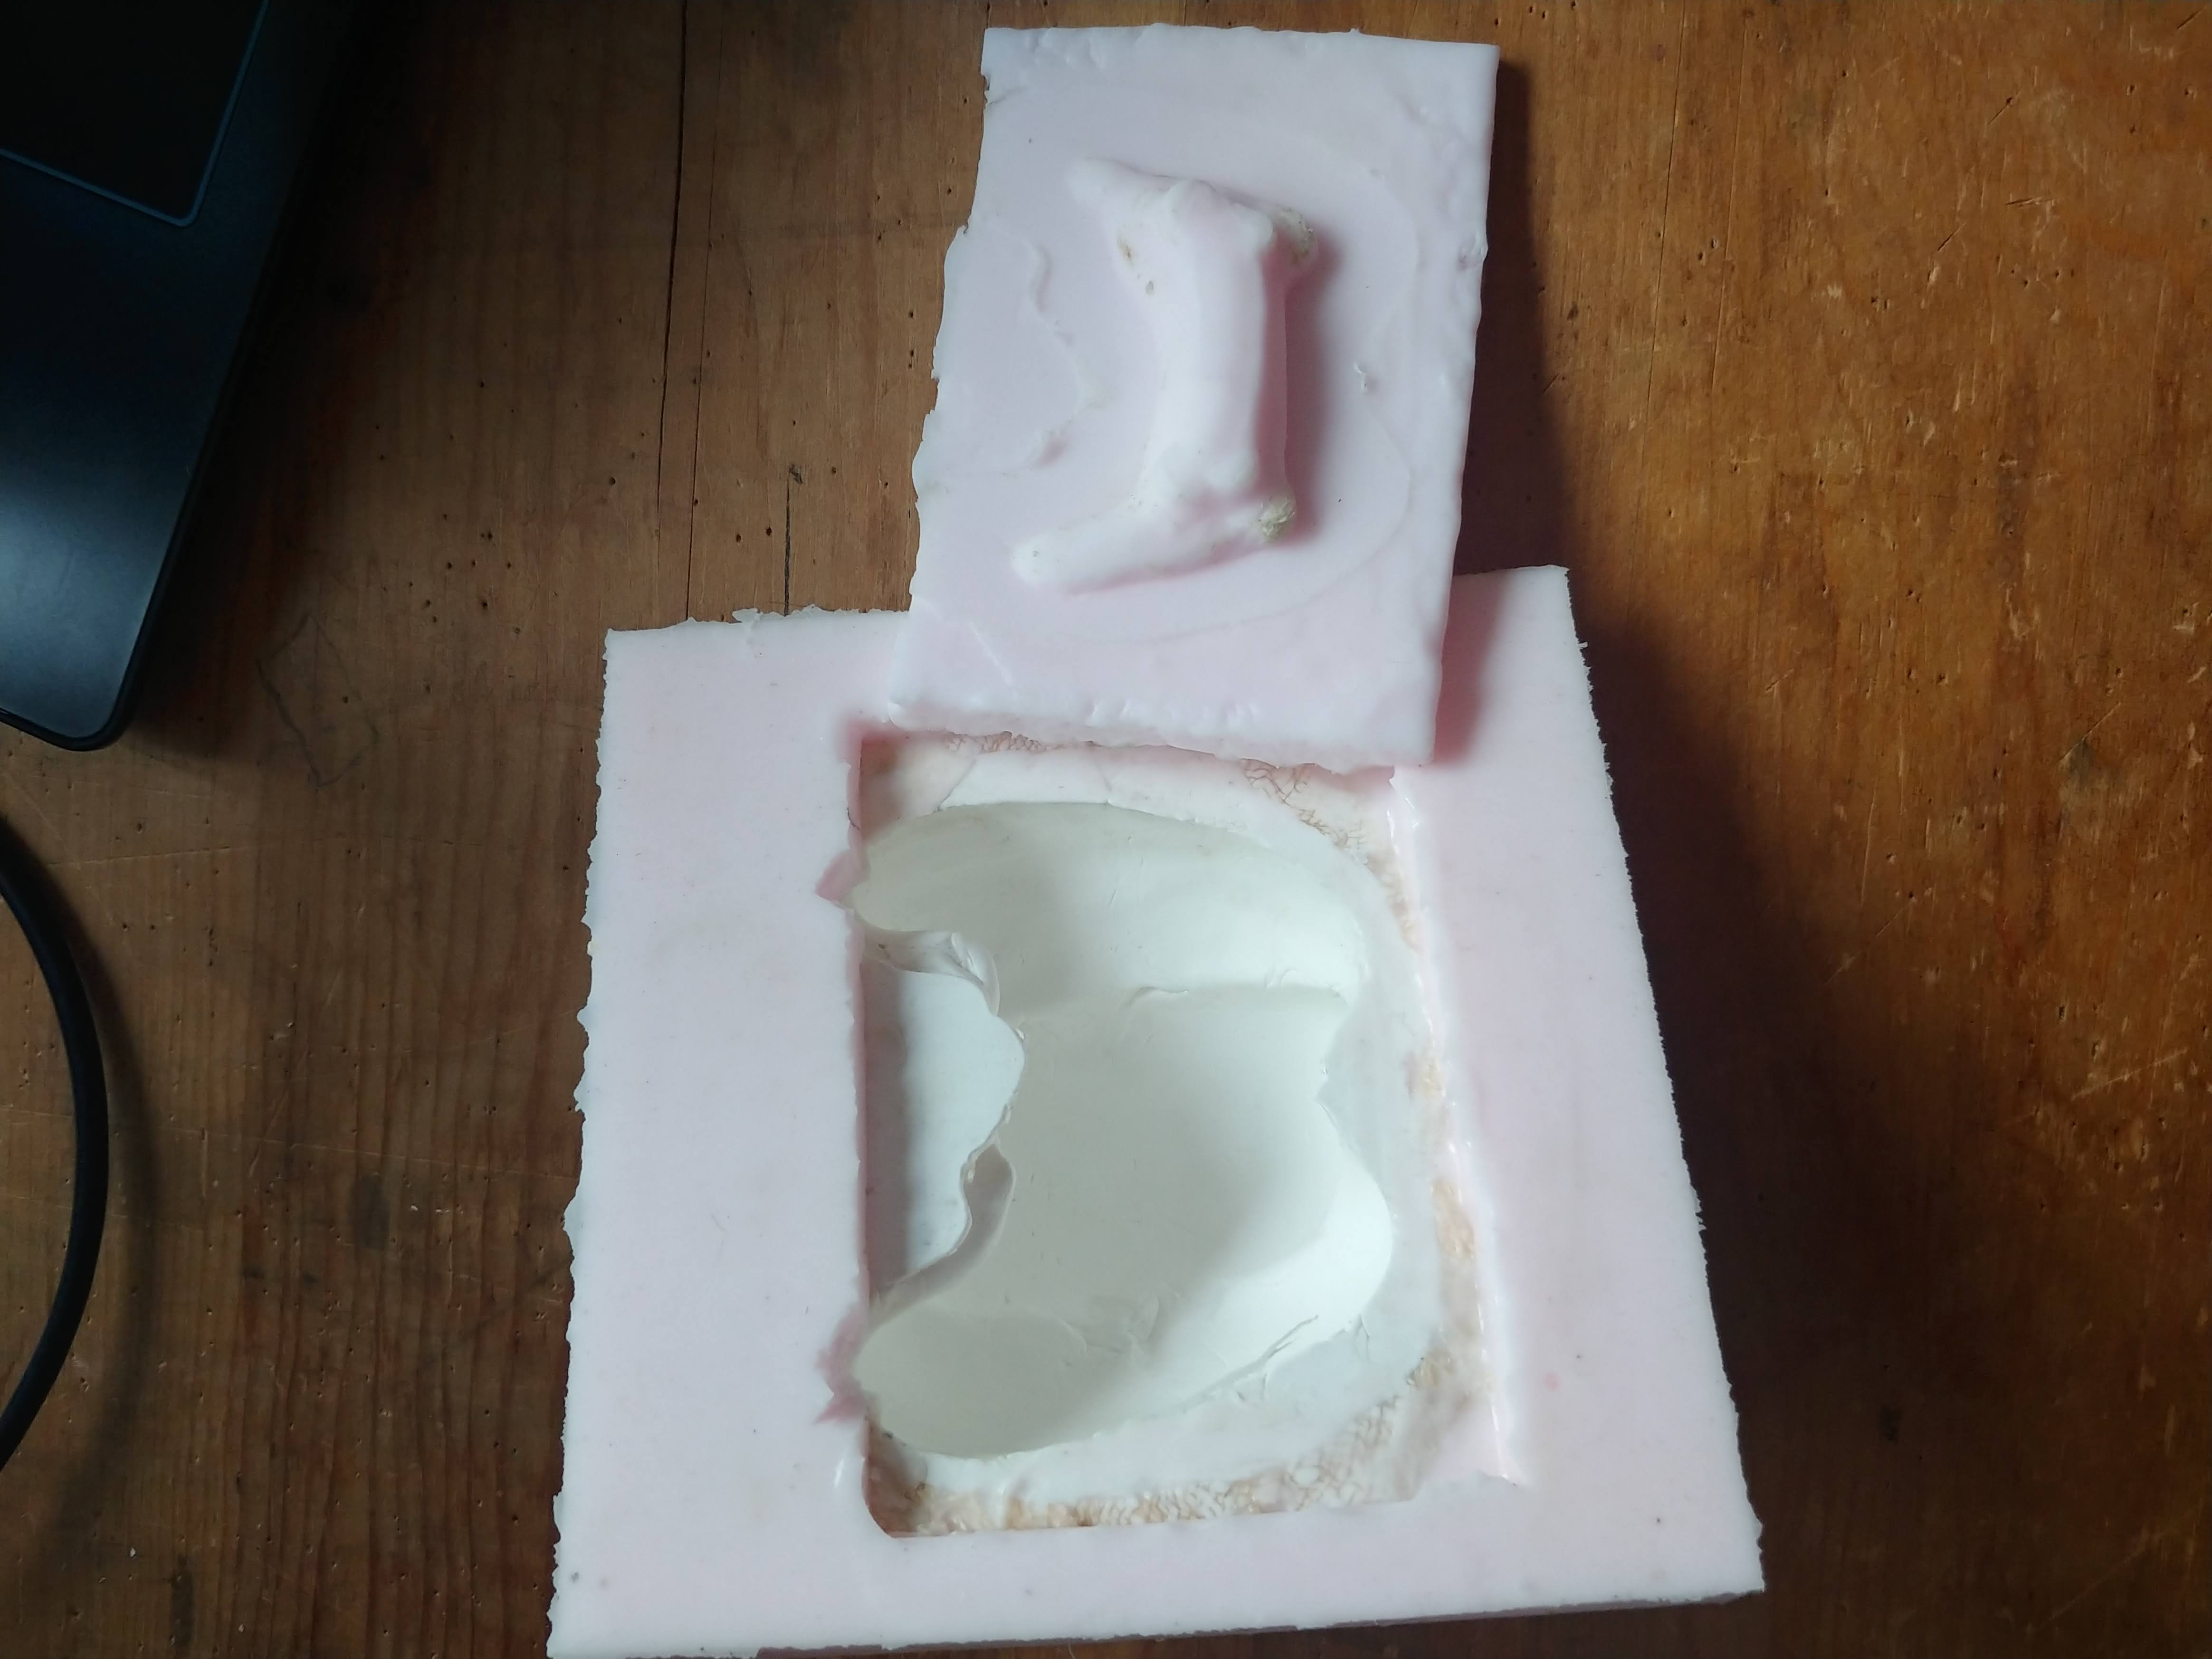
<p>Pouring plastic into this mold was difficult because once flipped, the mold would roll around. To rectify this I decided to try a commercial mold material called Mold Max 10[^1] made by a company called Smooth-On. I squared off the cheese cloth pepper mold with this new material so that it could easily be supported while the plastic cured. Luckily it worked; I wasn’t sure if the bathroom silicone and the Mold Max would bond, but they did just fine, as you can see from the pink-and-white finished pepper mold.</p>

<table>
  <thead>
    <tr>
      <th style="text-align: center">cheese cloth pepper mold</th>
      <th style="text-align: center">cheese cloth pepper</th>
    </tr>
  </thead>
  <tbody>
    <tr>
      <td style="text-align: center"><img src="/assets/ClimbingHoldPhotos/CheeseClothPepperMold.jpg" alt="" /></td>
      <td style="text-align: center"><img src="/assets/ClimbingHoldPhotos/CheeseClothPepper.jpg" alt="" /></td>
    </tr>
  </tbody>
</table>

<p><strong>A real mold box</strong></p>

<p>My next step in</p>

<p><strong>Croissants</strong></p>]]></content><author><name></name></author><category term="jekyll" /><category term="update" /><summary type="html"><![CDATA[Recently I discovered that I had lost all of my documentation from the time that I tried to DIY climbing holds from my little apartment in Montreal. I’m going to try to recall everything I learnt, re-try my final recipe, and re-document it here for anyone who might want to try themselves.]]></summary></entry><entry><title type="html">X11</title><link href="/jekyll/update/2021/05/25/X11.html" rel="alternate" type="text/html" title="X11" /><published>2021-05-25T00:00:00+00:00</published><updated>2021-05-25T00:00:00+00:00</updated><id>/jekyll/update/2021/05/25/X11</id><content type="html" xml:base="/jekyll/update/2021/05/25/X11.html"><![CDATA[<p><strong>The no-monitor life</strong></p>

<p>So you love developing little projects for your Raspberry Pi but for whatever reason you don’t have a monitor for it. Maybe you can’t afford the one you want right now, or maybe you don’t have the space in your apartment/van. All you have is a laptop and a Pi.</p>

<p><strong>You could</strong> launch a Flask web app where you stream the video feed from your picam, disconnect your laptop from your apartment’s Wi-fi, re-connect your laptop to the Pi’s Wi-fi signal and then go to localhost:4200. Bask in those glorious 8 Mega pixels.</p>

<p><strong>Or</strong> you could use X forwarding over SSH.</p>

<p><strong>To get going</strong></p>

<ol>
  <li>Start as you usually do by opening an SSH connection to the pi.</li>
  <li>Have an Xclient installed on the remote device. On the Raspberry pi it should already be installed. Try <code class="language-plaintext highlighter-rouge">startx</code> in a terminal on your pi to find out.</li>
  <li>If the PC with a display is running Windows, install <a href="https://sourceforge.net/projects/xming/">Xming</a>.</li>
  <li>Run Xming. If the icon shows up in your Task Bar (bottom right), it’s running.</li>
  <li>Using Putty, open an SSH connection to the Pi’s IP address, with X11 forwarding enabled. The default “X display location” will be Server:0.0, which is the default for Xming too, so nothing to enter here.</li>
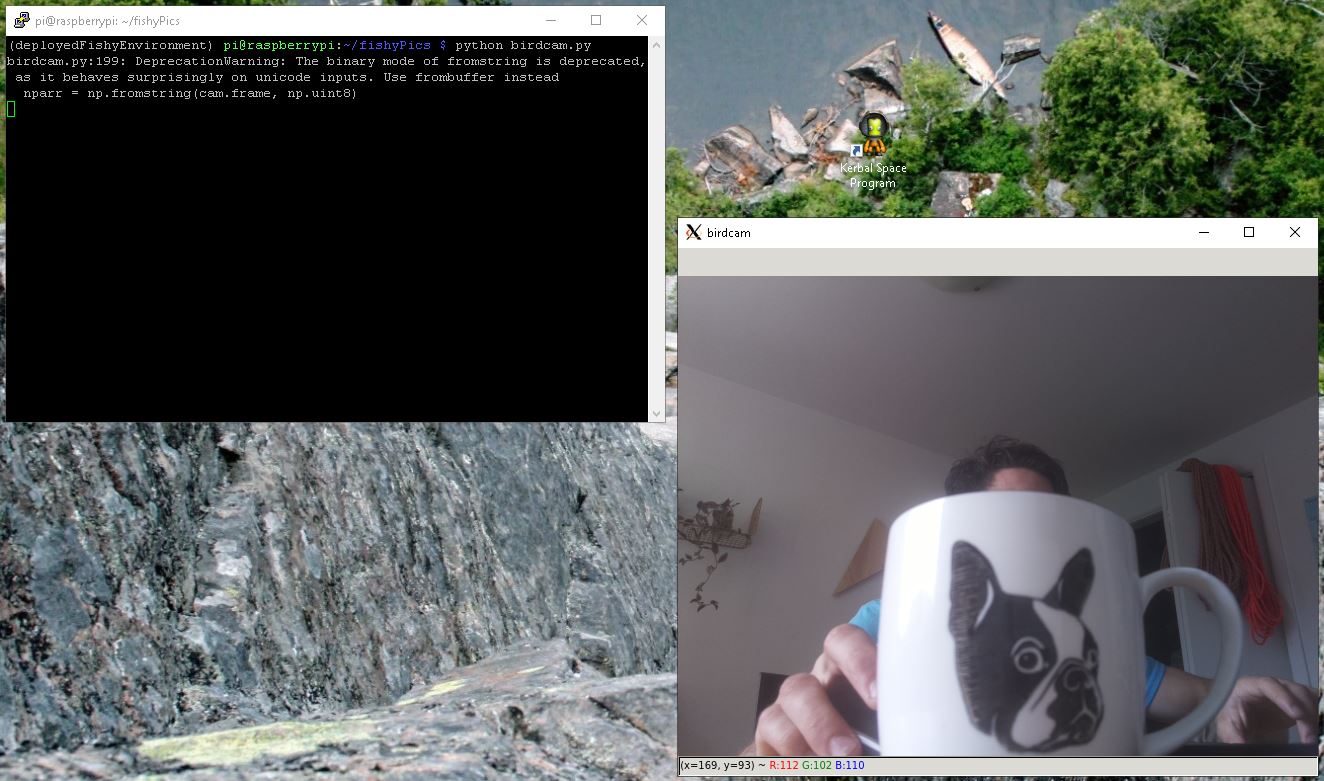
  <li>Run your application. It should show up on your Windows desktop:</li>
</ol>

<p><img src="/assets/Romeo2.JPG" alt="birdcam.py drawing it's window on my desktop. Free plug for Kerbal Space Program because it's awesome." /></p>

<p><strong>Snags</strong></p>

<p>On your Pi, in the sshd_config file at /etc/ssh you need to have the line:</p>

<p><code class="language-plaintext highlighter-rouge">X11Forwarding yes</code></p>

<p>uncommented. I also have the lines</p>

<p><code class="language-plaintext highlighter-rouge">X11DisplayOffset 10</code> and
<code class="language-plaintext highlighter-rouge">X11UseLocalHost yes</code></p>

<p>The line <code class="language-plaintext highlighter-rouge">X11UseForwarding yes</code> <strong>should not</strong> be written into your sshd_config. <a href="https://www.businessnewsdaily.com/11035-how-to-use-x11-forwarding.html">Some sites</a> mention this line, but this must be an outdated configuration, because it will prevent ssh from restarting correctly, and then you’ll no longer be able to log onto your Raspberry Pi unless you wipe the SD or buy a monitor (which we’ve established is not an option for you).</p>

<p><strong>Things you should know</strong></p>

<p>The PC on which you’re viewing the Pi’s output is the X <strong>server</strong>.<br />
<strong>Applications are the clients</strong> to this server, and are streaming the contents of their windows through SSH to Xming on your PC.</p>

<p><strong>The whole pi</strong></p>

<p>What if you want see your Pi’s desktop ? In this case: <code class="language-plaintext highlighter-rouge">startlxde-pi</code> will display pi’s user desktop on Xming, and <code class="language-plaintext highlighter-rouge">lxsession</code> will do the same for the root.</p>]]></content><author><name></name></author><category term="jekyll" /><category term="update" /><summary type="html"><![CDATA[The no-monitor life]]></summary></entry></feed>